One of the best things about fiberglass pools is how fast they go in. While concrete pool construction stretches across 3 to 6 months of your life — with your backyard looking like a construction zone the entire time — a fiberglass pool installation takes 7 to 10 business days from first shovel to first swim.
But what actually happens during those 7-10 days? If you're like most homeowners, you want to know exactly what's going on in your backyard, when things will be loud, and when you'll need to be home.
Here's the full day-by-day breakdown of a typical fiberglass pool installation in Jacksonville, based on how we do things at iTopPools.
Before Day 1: The Pre-Installation Prep
Before a single piece of equipment touches your yard, several things need to happen:
Permits Approved
Your pool permit has been reviewed and approved by your county (Duval, St. Johns, Clay, or Nassau). This is the green light that allows us to start work. The permit process typically takes 25-30 business days in Duval County.
Pool Shell Ordered and Scheduled
Your Barrier Reef pool shell has been manufactured in Timmonsville, South Carolina, and freight delivery has been coordinated. We time the delivery to arrive right when we need it — usually Day 3 of the installation.
Utility Locates
We've called 811 (Sunshine State One Call) to have all underground utilities marked on your property — gas, electric, water, sewer, cable, phone. This is a legal requirement and a safety essential.
Pre-Construction Meeting
We'll walk through the project plan with you one more time: pool placement, equipment pad location, decking layout, access path for equipment, and any concerns. We'll also confirm the dig start date and discuss what to expect each day.
Day 1-2: Excavation
What Happens
This is the biggest, loudest, most dramatic part of the process. An excavator arrives (typically a mid-size track machine for residential work) and digs the hole for your pool.
The hole is dug to match the exact dimensions and depth profile of your specific Barrier Reef pool model, with additional room for backfill material around the sides and a gravel base on the bottom.
Jacksonville Clay Soil: What to Know
This is where local expertise matters. Jacksonville's clay soil doesn't behave like the sandy soil you find at the beach. Clay is heavy, sticky when wet, and tends to hold water. Here's how we handle it:
- Dewatering. If groundwater seeps into the excavation (common in many Jacksonville neighborhoods), we use pumps to keep the hole dry during installation.
- Over-excavation. We dig slightly wider than standard to allow for proper drainage gravel around the shell. This prevents hydrostatic pressure buildup against the pool walls.
- Soil stockpiling. The excavated clay is stockpiled on your property (or hauled away, depending on your preference and the amount). Some of it can be used for final grading; the rest typically needs to go.
What You'll Notice
- Heavy equipment in your yard — expect some lawn damage in the access path (we'll restore it)
- Noise from the excavator — normal business hours only
- A very large hole in your backyard by the end of Day 2
- A pile (or several piles) of excavated soil
Inspection
After excavation, we schedule the pre-pour/excavation inspection with the county. An inspector verifies the hole dimensions, setbacks, and that no utility lines were disturbed.
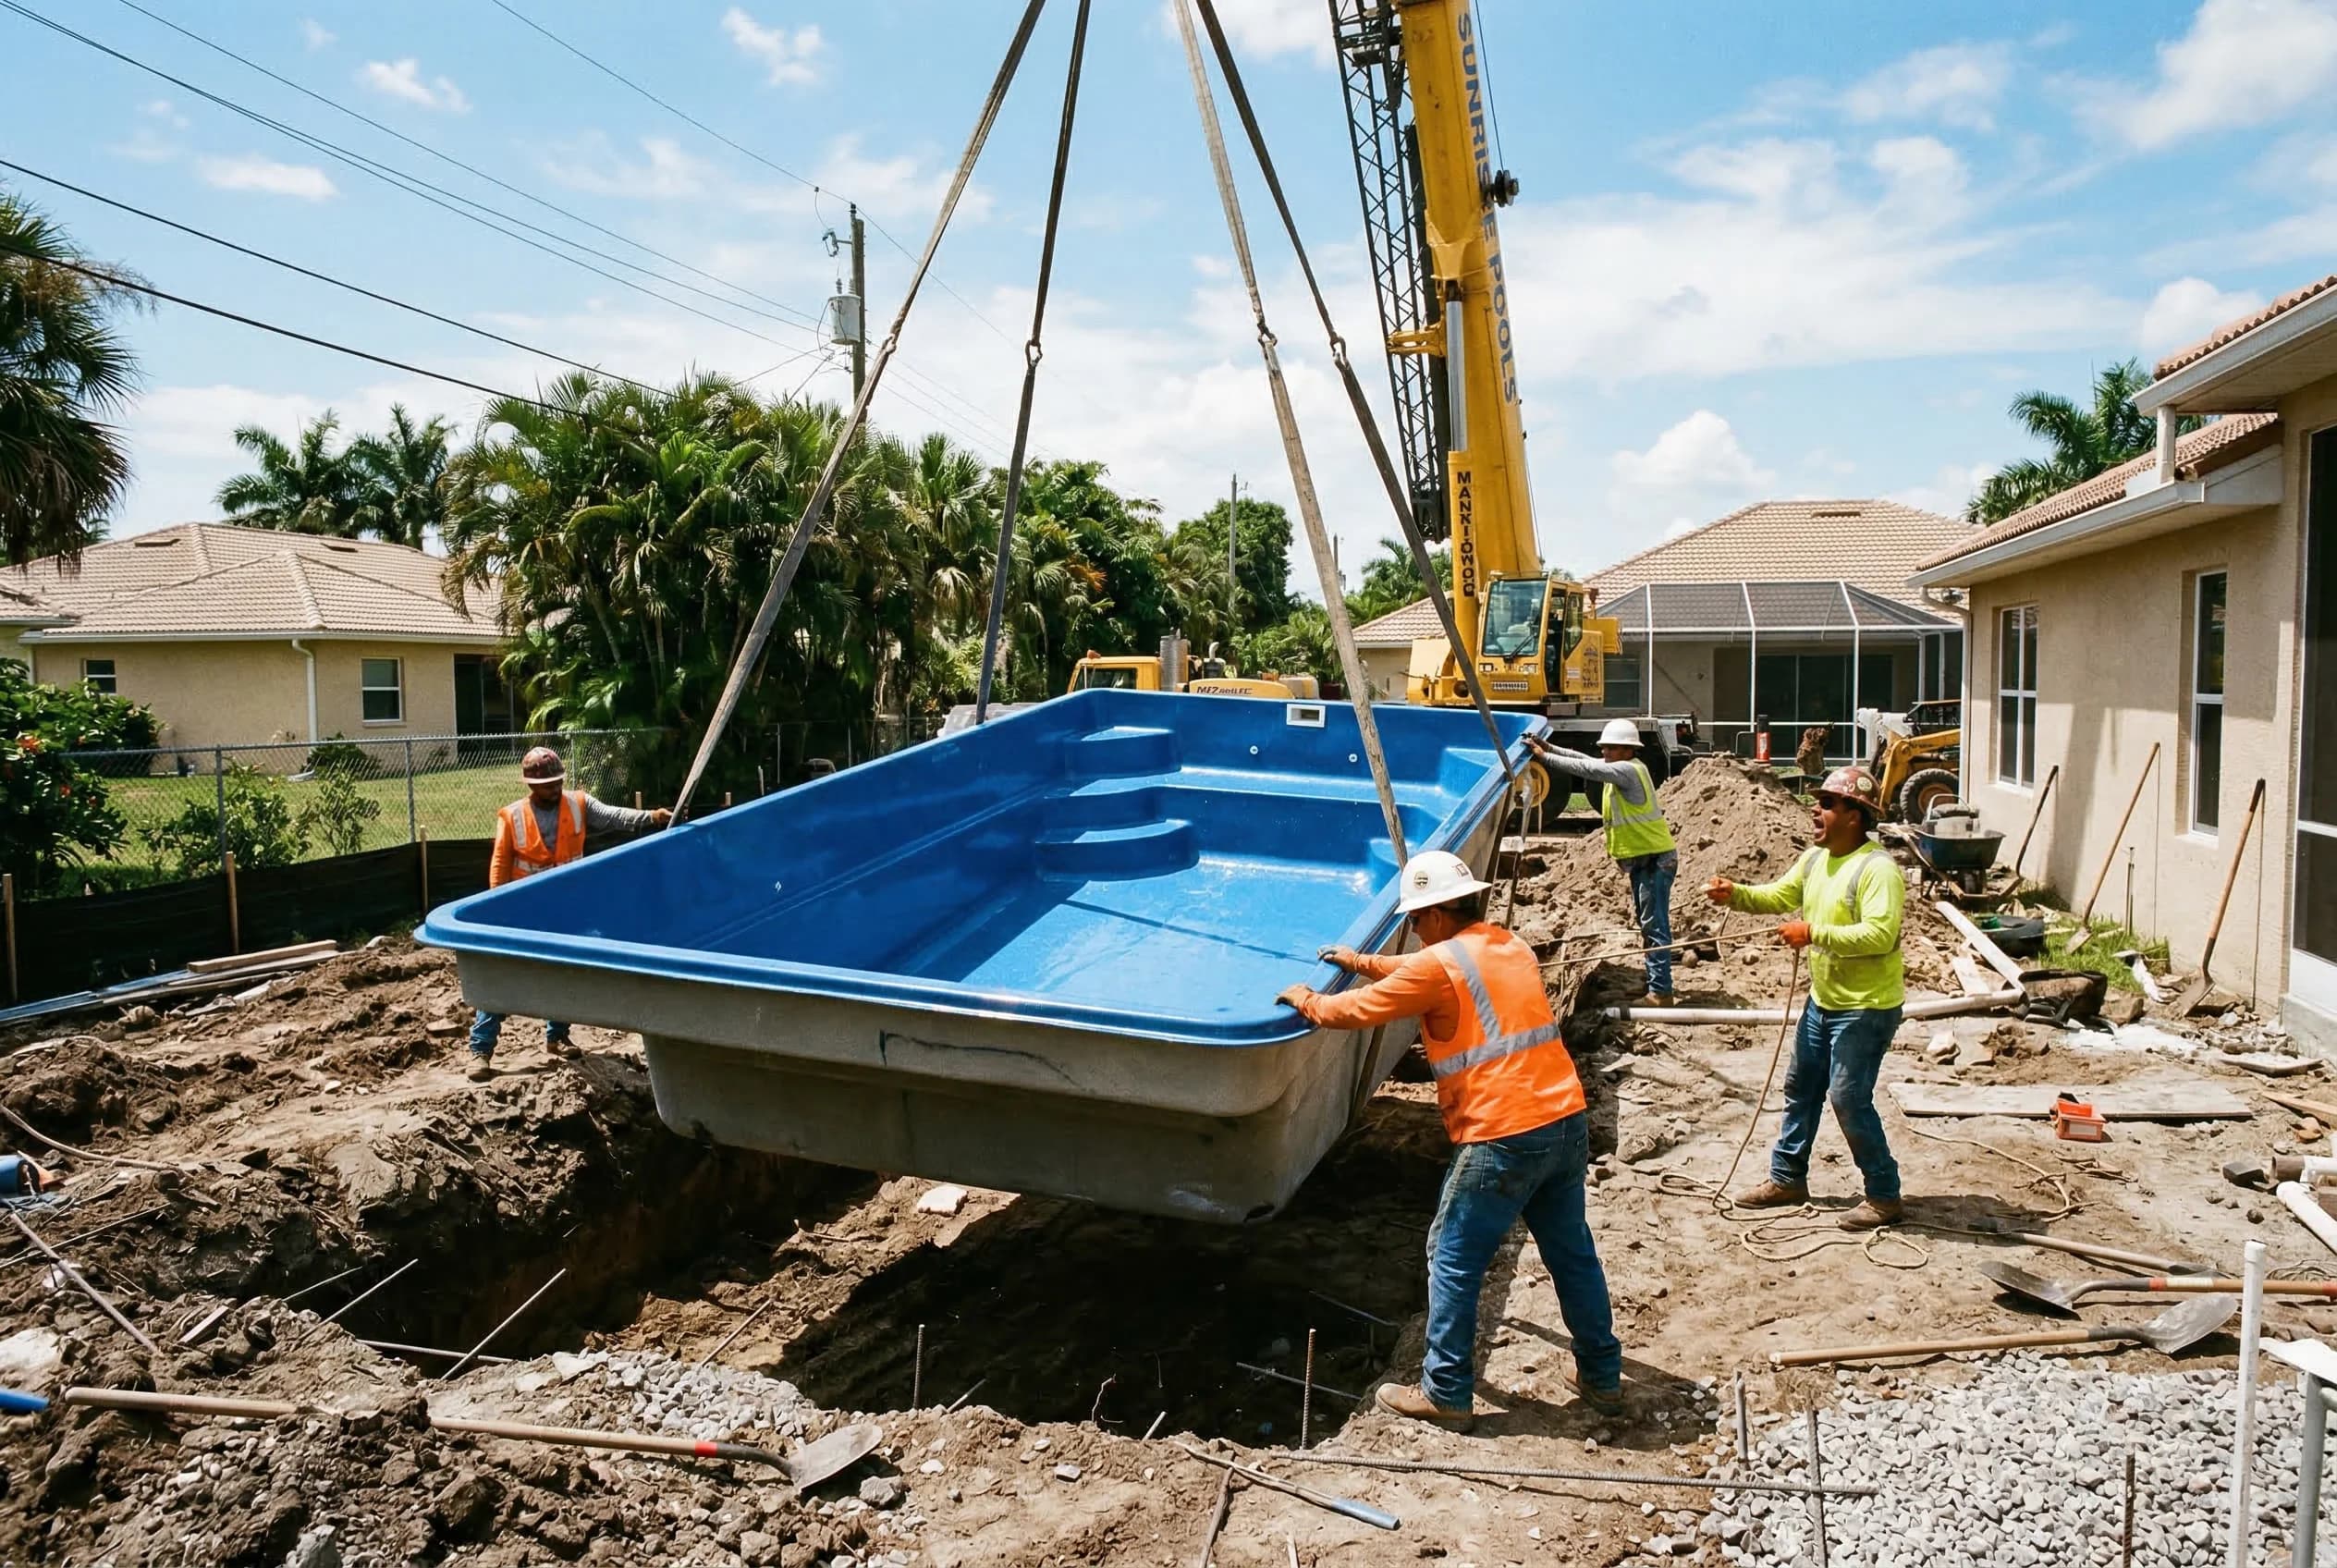
Day 3: Pool Shell Delivery and Setting
What Happens
This is the day that makes the neighbors come out and watch. Your fiberglass pool shell arrives on a specialized delivery truck and is lifted by crane over your house (or through your side yard, depending on access) and lowered into the prepared excavation.
The Delivery
The pool shell travels approximately 300 miles from Barrier Reef's manufacturing facility in Timmonsville, SC. It arrives on an oversized flatbed trailer with specialized supports. The delivery team coordinates arrival time with our crane operator so everything flows smoothly.
The Crane Set
A crane lifts the pool shell off the truck and carefully positions it over your backyard. An iTopPools crew member guides the shell into the excavation from below, ensuring it's perfectly aligned and level.
This process takes about 1 to 3 hours from truck arrival to shell placement. It's genuinely impressive to watch — a complete pool appearing in your backyard in a single morning.
Leveling
Once the shell is in the hole, we spend significant time ensuring it's perfectly level in all directions. This is critical. A pool that's even slightly off-level will have an uneven water line that's visible and unfixable without removing the pool. We use laser levels and check multiple points across the pool.
What You'll Notice
- A large crane in your driveway or street (we coordinate with the city for any necessary street access)
- Brief but significant activity — the actual set takes a few hours, but prep and cleanup extend the day
- By the end of Day 3, there's a real pool in your backyard — it just doesn't have water yet
Day 4-5: Plumbing, Electrical, and Backfill
Plumbing (Day 4)
Our plumbing crew runs all the lines from the pool to the equipment pad location:
- Suction lines from the skimmer and main drain to the pump
- Return lines from the filter back to the pool's return jets
- Dedicated lines for water features, spa jets, or other extras you've chosen
- Equipment pad preparation — the concrete pad where your pump, filter, heater, and other equipment will sit
All plumbing is pressure-tested to ensure there are no leaks before anything gets buried.
Electrical (Day 4-5)
A licensed electrician (either our crew or a trusted subcontractor) handles:
- Subpanel installation — a dedicated electrical panel for the pool equipment, typically 60-100 amps
- Equipment wiring — connecting the pump, heater, lights, and automation system
- Bonding — all metal components in and around the pool are bonded together and connected to the grounding system (this is a critical safety requirement)
- GFCI protection — all pool-related circuits are protected by ground-fault circuit interrupters
- Pool lights — LED lights are installed in the pool shell's pre-molded light niches
Backfill (Day 5)
With plumbing and electrical in place, we begin backfilling around the pool shell. This is one of the most important steps in the entire process:
- We use clean, compactible gravel (not the clay soil we dug out) as backfill material
- Backfill is placed in 12-inch lifts — meaning we add 12 inches at a time, compact it, then add the next 12 inches
- Simultaneously, we add water to the pool at the same rate as the backfill rises outside. This equalizes pressure on the pool shell and prevents it from shifting
- The backfill/water process takes most of a day to do properly
Inspection
We schedule the plumbing rough-in and electrical rough-in inspections during this phase. The county inspector verifies that all plumbing and electrical work meets code before we cover anything up.
What You'll Notice
- Multiple crew members working in and around the pool
- Plumbing and electrical materials staged in your yard
- The pool slowly filling with water during the backfill process
- Things are starting to look like a real pool project
Day 6-7: Decking and Coping
Coping Installation
Coping is the cap or edge treatment that sits on top of the pool shell and transitions to the surrounding deck. We install the coping system first, which provides a clean, finished edge around the pool perimeter.
Barrier Reef pools are designed to work with multiple coping styles:
- Cantilever coping — concrete poured to overhang the pool edge, creating a seamless look
- Bullnose coping — individual coping stones set around the pool edge
- Paver coping — matching your paver deck material
Decking
Your pool deck is poured or laid during this phase. Depending on the material you've chosen:
- Brushed or stamped concrete — forms are set, concrete is poured, and finish work (stamping, brushing, coloring) happens while the concrete is still workable. Concrete needs several days to cure before heavy use.
- Pavers — a compacted base is prepared, and individual pavers are laid in your chosen pattern. Pavers are usable almost immediately.
- Travertine — similar installation to pavers, with additional care for the natural stone material.
What You'll Notice
- Concrete trucks (if doing poured concrete decking) — this is another big, visible day
- The pool area is really starting to take shape
- The transformation from "construction site" to "backyard resort" happens fast during this phase. Looking to go beyond the pool? We also offer patios, kitchens, and enclosures to complete your outdoor space
Day 8-10: Equipment Installation, Fill, Startup, and Walkthrough
Equipment Installation (Day 8)
All the equipment that was wired and plumbed earlier now gets fully installed and connected on the equipment pad:
- Variable-speed pump — connected to suction and return lines
- Filter (cartridge or DE) — plumbed inline
- Heater (heat pump or gas) — connected to electrical and plumbing
- Salt chlorine generator (if applicable) — installed on the return line
- Automation system — connected to all equipment, programmed, and linked to your phone app
- Pool cleaner — robotic or suction-side, tested and ready to go
Pool Fill and Chemistry (Day 8-9)
By this point, the pool has been partially filled during the backfill process. We complete the fill to the proper level and then begin the water chemistry startup:
- Test and balance pH, alkalinity, calcium hardness, and stabilizer levels
- Initial sanitizer dose to establish clean, safe water
- Equipment startup sequence — running the pump, checking flow rates, testing the heater, confirming the automation system works
- Leak check — we verify all plumbing connections one final time with the system fully pressurized and running
Barrier Inspection (Day 9)
The county inspector verifies that your pool barrier (fence, screen enclosure, or home wall with alarms) meets all Florida Statute 515 requirements before the pool can be used.
Final Inspection and Walkthrough (Day 10)
This is the finish line:
County Final Inspection: The building inspector visits for the final inspection, verifying that the entire project — pool, equipment, electrical, plumbing, barrier, and decking — meets all code requirements. Once this passes, you receive your Certificate of Completion.
Your iTopPools Walkthrough: We spend time walking you through everything:
- How to operate your pump, filter, heater, and automation system
- How to use the phone app to control your pool remotely
- Basic water chemistry — what to test, how often, and what to add
- Equipment maintenance schedule
- Warranty information for your Barrier Reef pool and all equipment
- Our contact information for any questions that come up
Then we hand you the keys. Or rather, we hand you the pool skimmer and say: go swim.
Weather Delays: The Jacksonville Reality
Jacksonville weather is part of the process. Here's how it typically affects installation:
- Summer afternoon thunderstorms can delay work by a few hours but rarely cause full-day shutdowns. Our crews start early (7-8 AM) to maximize dry working time.
- Extended rain events (tropical storms, multi-day fronts) can pause the project for 1-3 days. Excavation and concrete work are the most weather-sensitive phases.
- Extreme heat in summer doesn't typically delay work, but our crews take appropriate breaks for safety.
On average, weather adds 0 to 3 days to the overall timeline. We build this buffer into our scheduling.
The Full Timeline at a Glance
| Day | Activity | Duration |
|---|---|---|
| Day 1-2 | Excavation | 1.5 – 2 days |
| Day 2-3 | Excavation inspection | 0.5 day (waiting for inspector) |
| Day 3 | Pool shell delivery and crane set | 0.5 day |
| Day 4 | Plumbing rough-in | 1 day |
| Day 4-5 | Electrical rough-in | 1 – 1.5 days |
| Day 5 | Backfill with simultaneous water fill | 1 day |
| Day 5-6 | Plumbing and electrical inspections | 0.5 day |
| Day 6-7 | Coping and decking | 1.5 – 2 days |
| Day 8 | Equipment installation | 1 day |
| Day 8-9 | Pool fill completion and chemistry startup | 1 day |
| Day 9 | Barrier inspection | 0.5 day |
| Day 10 | Final inspection and homeowner walkthrough | 0.5 day |
Total: 7-10 business days of active work
What Comes After: Your First Month
The first 30 days with your new pool involve some extra attention:
- Check water chemistry 2-3 times per week as the water stabilizes (after that, once a week is fine)
- Run the pump 8-12 hours per day initially, then adjust based on water clarity and your equipment
- Watch for any settling around the pool deck and equipment pad — minor settling is normal and we'll address it if needed
- Call us with any questions — seriously, no question is too small during your first month
Ready to Start Your Pool Project?
Now that you know exactly what to expect, the only question left is: when do you want to start? The sooner you begin the process, the sooner you'll be swimming.
[Get Your Free Quote at itoppools.com/quote](https://itoppools.com/quote)
We'll visit your property, walk you through the process in person, and give you a detailed timeline specific to your yard and your county. Explore our pool models to start picturing which one will land in your backyard. Let's get you in the water.